

Pentesting on Non-Jailbroken IOS Device’s– PART1
Mobile application security is a vast field and surprisingly it has grown tremendously in past years. The domain largely revolves around iOS, Android, Blackberry, Windows and Symbian operating systems and here we are going to highlight some shades of iOS Pen testing.
iOS is a mobile operating system developed by Apple Inc. This article specifically focuses on techniques and tools that will help security professionals and researchers understand penetration testing methods on non-jailbroken devices.
To setup a Mobile Pentesting platform usually you need a Jailbroken iOS device. Jailbreaking is a process of removing hardware restrictions on your iOS device to provide root access to iOS file systems and manager, including allowing untrusted applications, teams and extensions that are not available through the Official App store.
But if you don’t have a jailbroken device or if you don’t want to jailbreak your iOS device, you can still perform Pentesting on nonjailbroken device with this guide. So, let’s set up the testing environment.
• What you need –
A non-jailbroken device, a Windows System with some tools installed.
• How to install pirated/copied/test application –
There are many tools like iFunbox and iTools that don’t need jailbroken devices. Here, we are going to use the iFunbox tool for app installation. To install an application which needs to be tested, open iFunbox, click on iFunbox classic. It will show the list of all the installed applications on your device.
Alternatively, you can install any official app from the App store too.
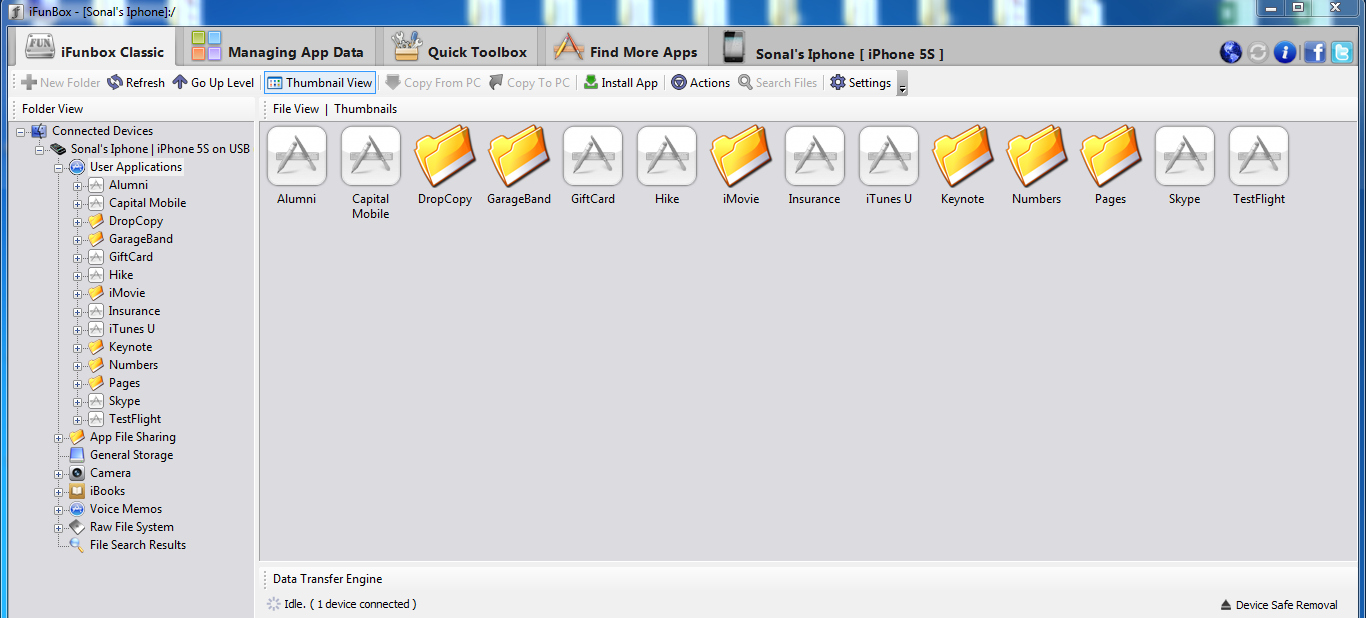
Figure 1
Now click the ‘Install App’ button and select the application .ipa file which needs to be tested.
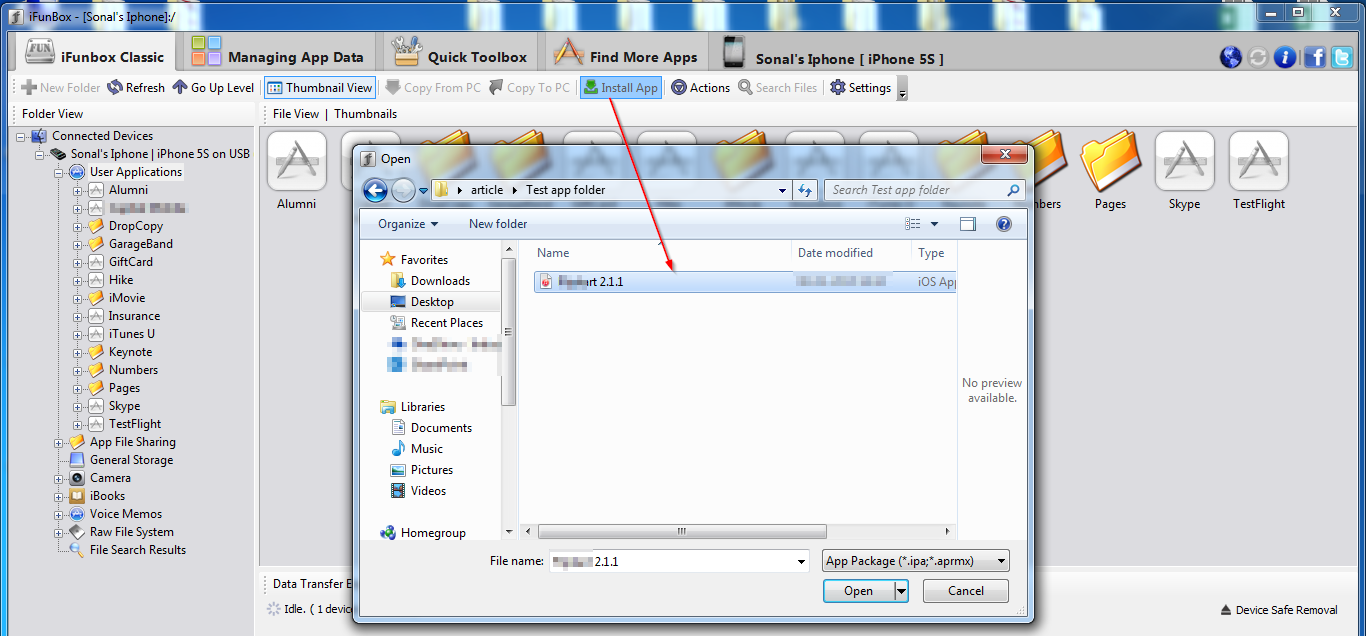
Observe in the figure 3 that the application has been successfully installed.
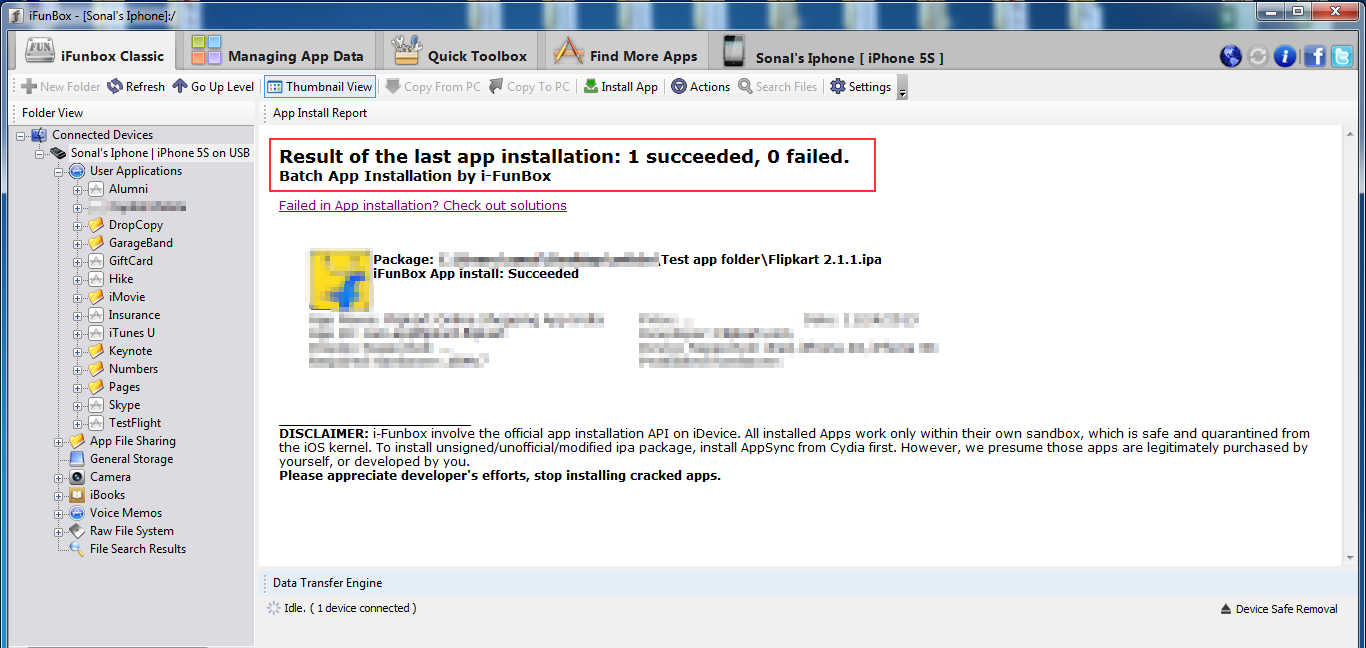
Figure 3
Now check your iOS device to determine if the application is installed and working properly or not.
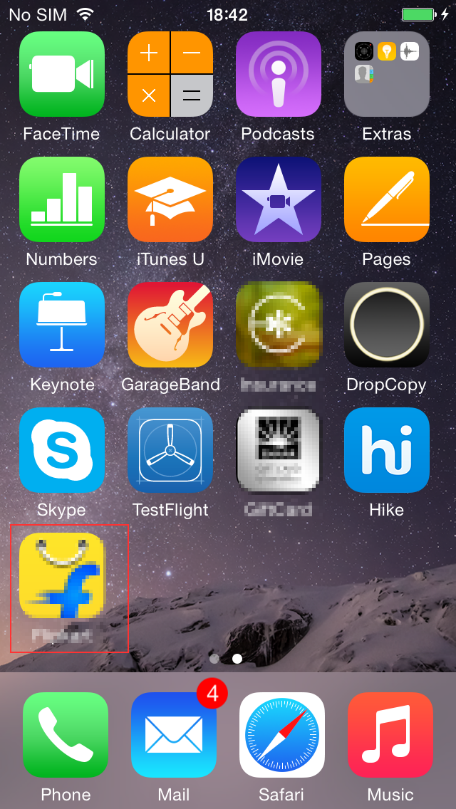
Figure 4
• Application Traffic Analysis
The application traffic analysis part is identical for network pentesting and web pentesting as both involve client interaction with server components over the network using some protocol.
Our main goal is to capture and analyse the network traffic and find vulnerabilities. iPhone applications may use the http or https protocol to transmit the data.
How to capture http – Plain text traffic
Many of the mobile applications are still working on plain text transmission logic i.e. http protocol, and such applications are vulnerable to MiTM attacks as a lot of people access them over open Wi-Fi. The traffic analysis can be configured by setting up a proxy first. On your workstation (Windows machine), open Burp suite and make it listen on port 8080. Select the ‘All interfaces’ option and put a tick mark on ‘support invisible proxying’ under Proxy Listener options.
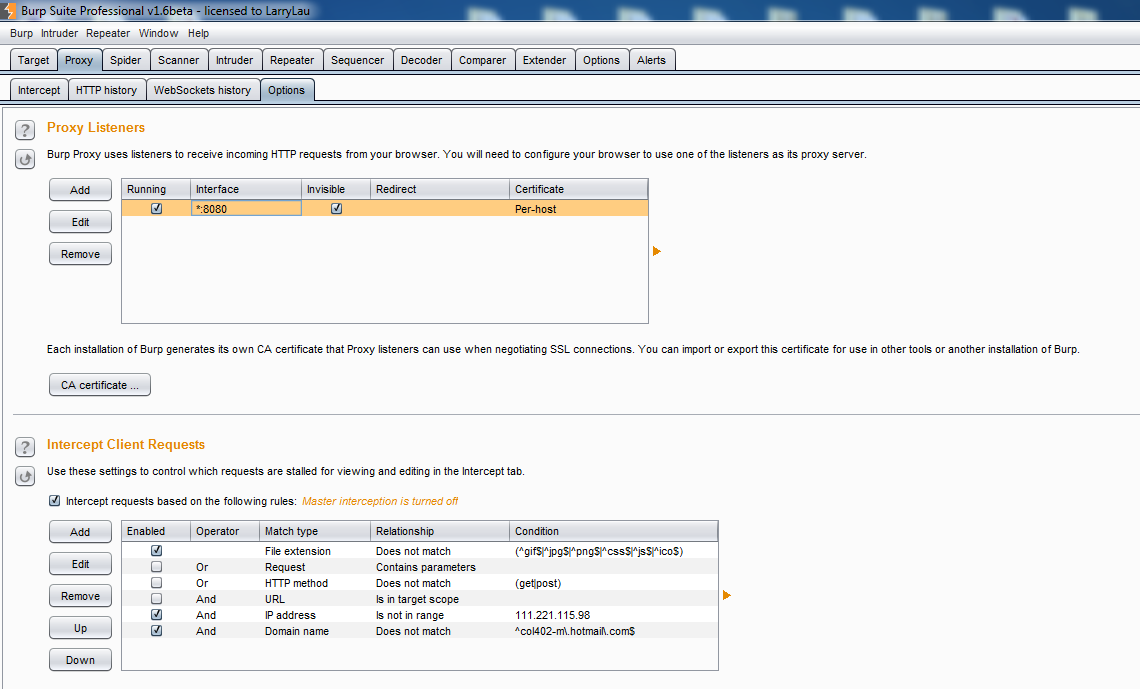
Figure 5
Now go to ‘Settings’ – Select your Wi-Fi network – Click on ‘Manual’ under the HTTP Proxy option.
Here edit ‘Server’ as your Workstation IP address and Port as 8080. ‘Save’ the settings.
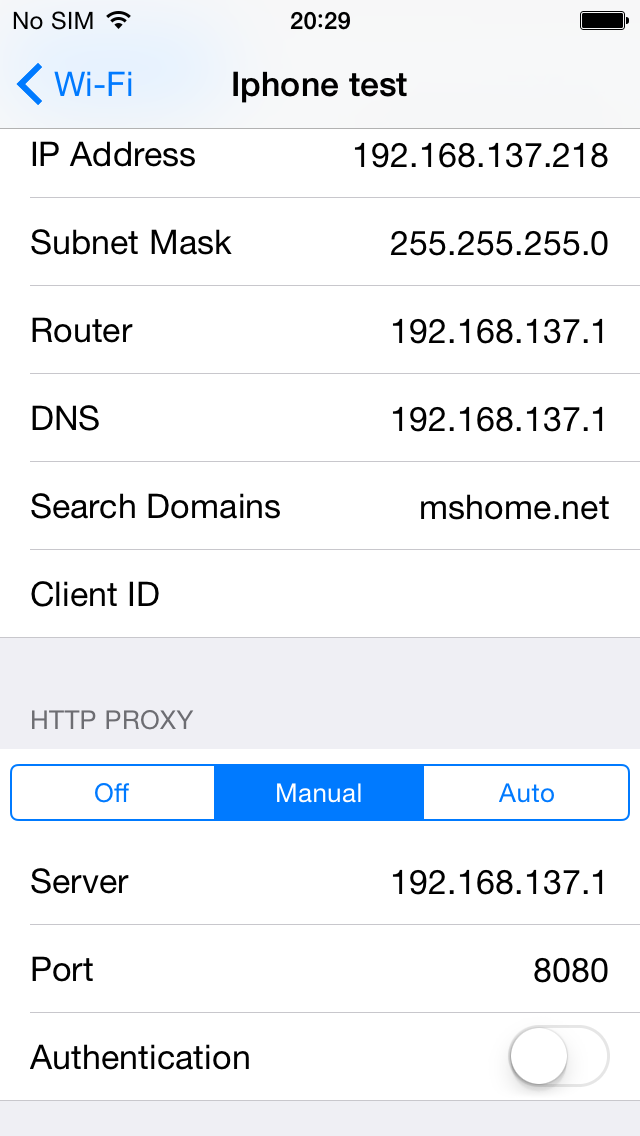
Figure 6
Now access the application which needs to be tested. Observe in the below snapshots that the http application in iPhone routes the traffic to your workstation and the same is displayed in Burp Suite.
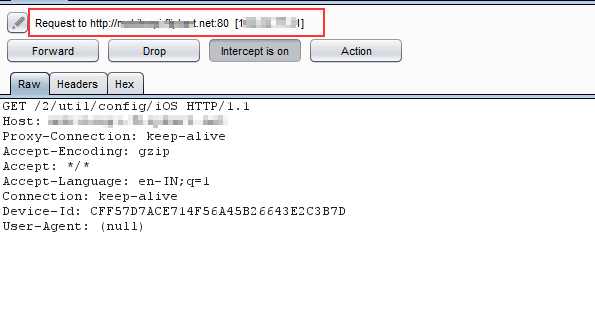
Figure 7
How to capture https – encrypted traffic
Analysis of the https protocol is the same as http, but sometimes it gets a little tricky.
Generally all browser based applications tend to validate the server side certificate but if we go for native applications then the developers have to write certificate validation code.
While testing we need to first validate whether the application is accepting invalid certificates or gives the invalid certificate error.
To capture HTTPs traffic, there are two options available
- By installing the burp CA certificate to the iPhone trusted certificate list and later if the application receives a proxy certificate it will not display any certificate error because we have told our iPhone to trust that certificate. This will allow us to capture the https traffic.
- Use the same procedure as above but instead of burp proxy use the fiddler proxy tool and later fiddler proxy navigate to burp.
The second option seems awkward but it works every time for me. Here we will use the second option to capture https traffic.
First we need to setup fiddler and burp on our workstation (Windows machine). Open the fiddler proxy tool. Go to the WinINET option, and disable the system proxy, so that fiddler can capture only remote proxy.
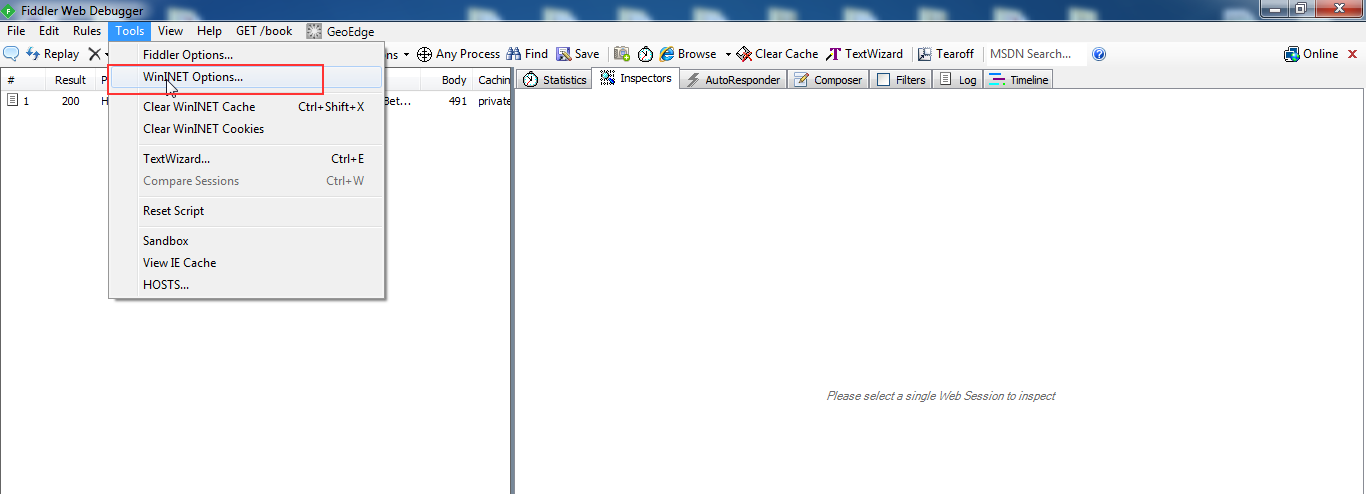
Figure 8
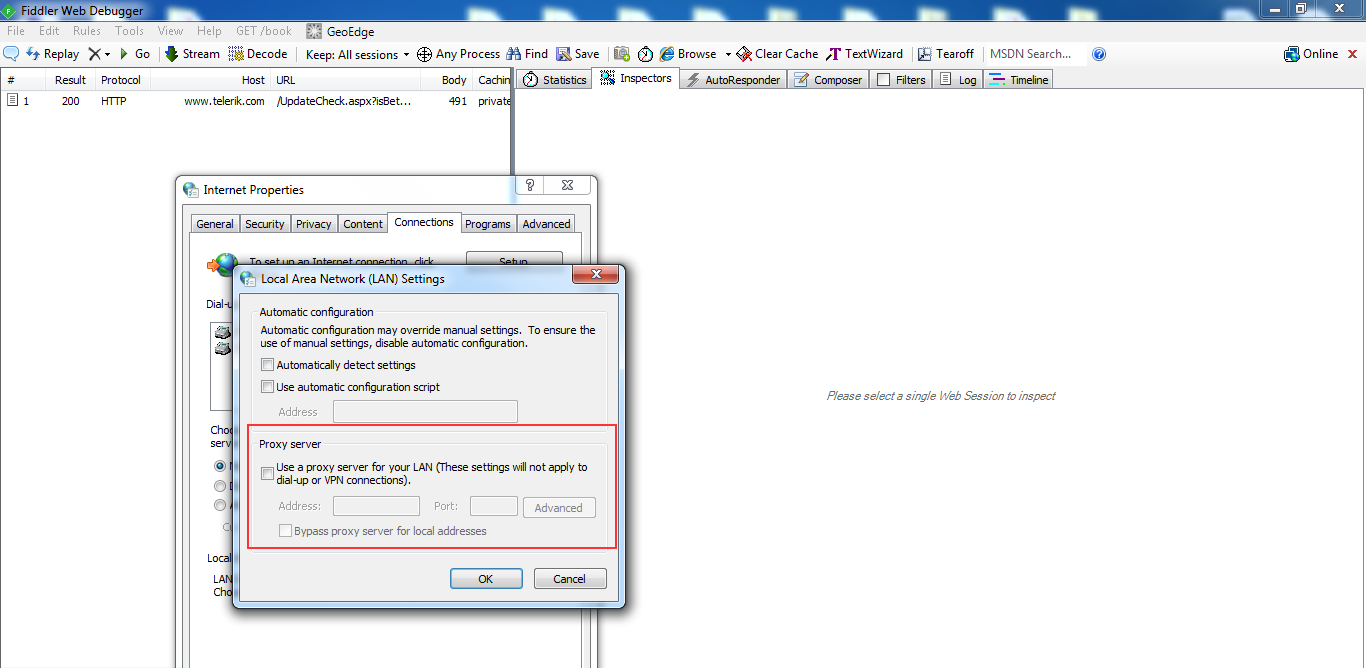
Figure 9
Now go to – Tools – Fiddler Options, and make a tick mark on Capture HTTPS CONNECTs. Also select ‘Allow remote computers to connect’ under Connections tab.
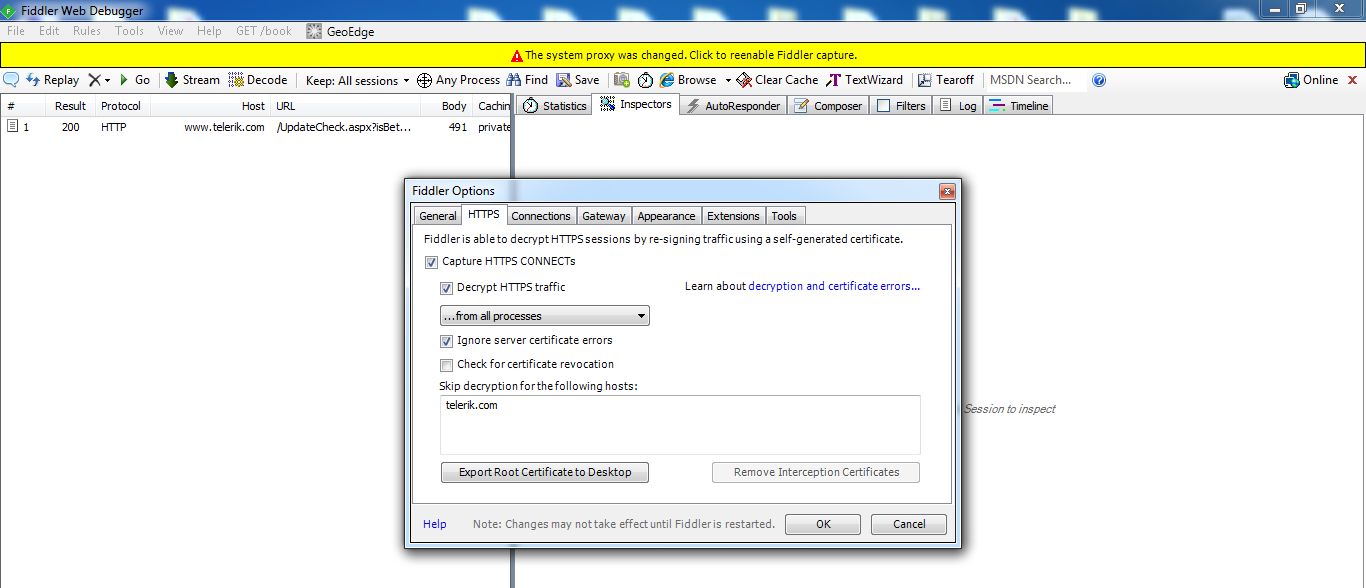
Figure 10
Now go to the – Gateway tab and select Manual proxy configuration. Here, put manual proxy as localhost and make it listen on port 8080. With the help of this setting, the fiddler’s traffic will be going to navigate the Burp tool.
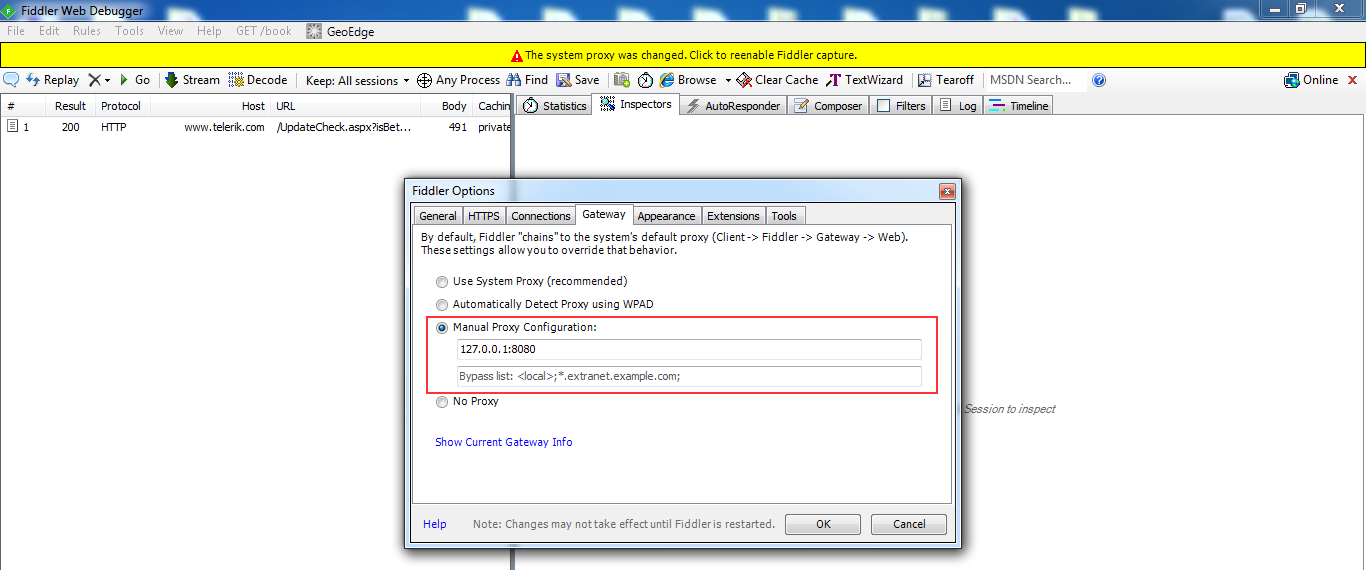
Figure 11
Now open Burp suite and make it listen on port 8080. Select ‘All interfaces’ option and put a tick mark on ‘support invisible proxying’ under Proxy Listener options.
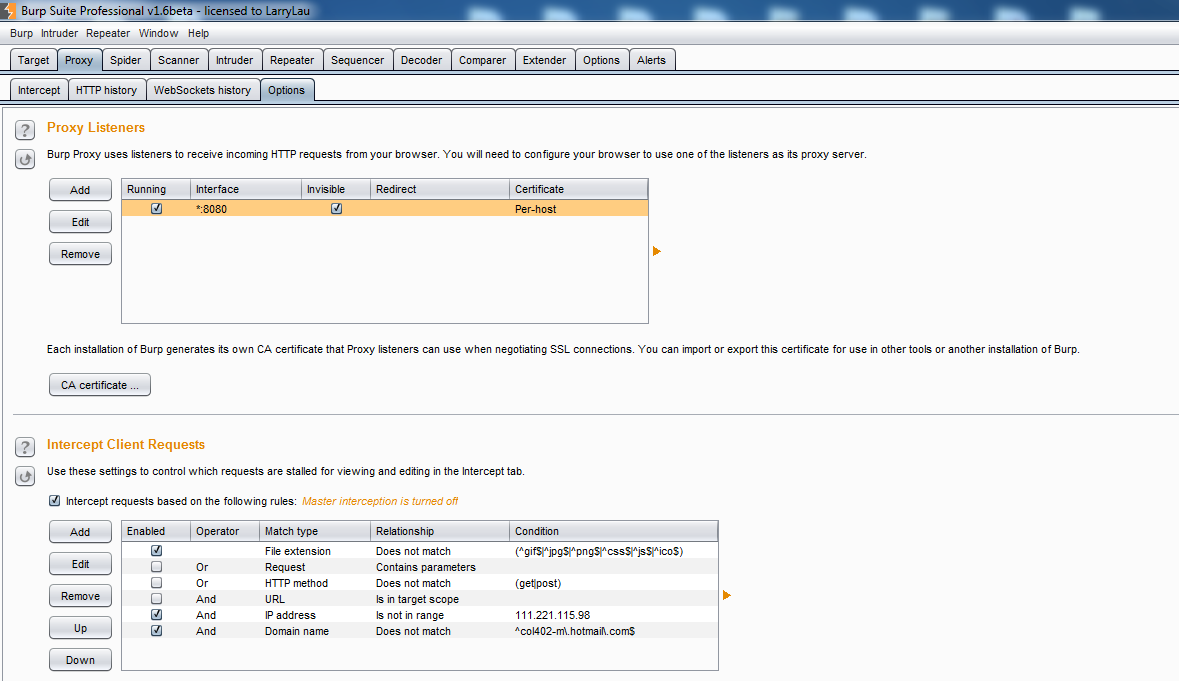
Figure 12
We are almost done with workstation settings. To make an application trust fiddler, we just need fiddler’s certificate to be installed on the iPhone device. To extract the fiddler’s certificate, go to the HTTPS tab on the tool menu inside fiddler. Click on ‘export root certificate to desktop’ and then simply email that certificate to the iPhone device. This is the easiest way to transfer the fiddler certificate to the device.
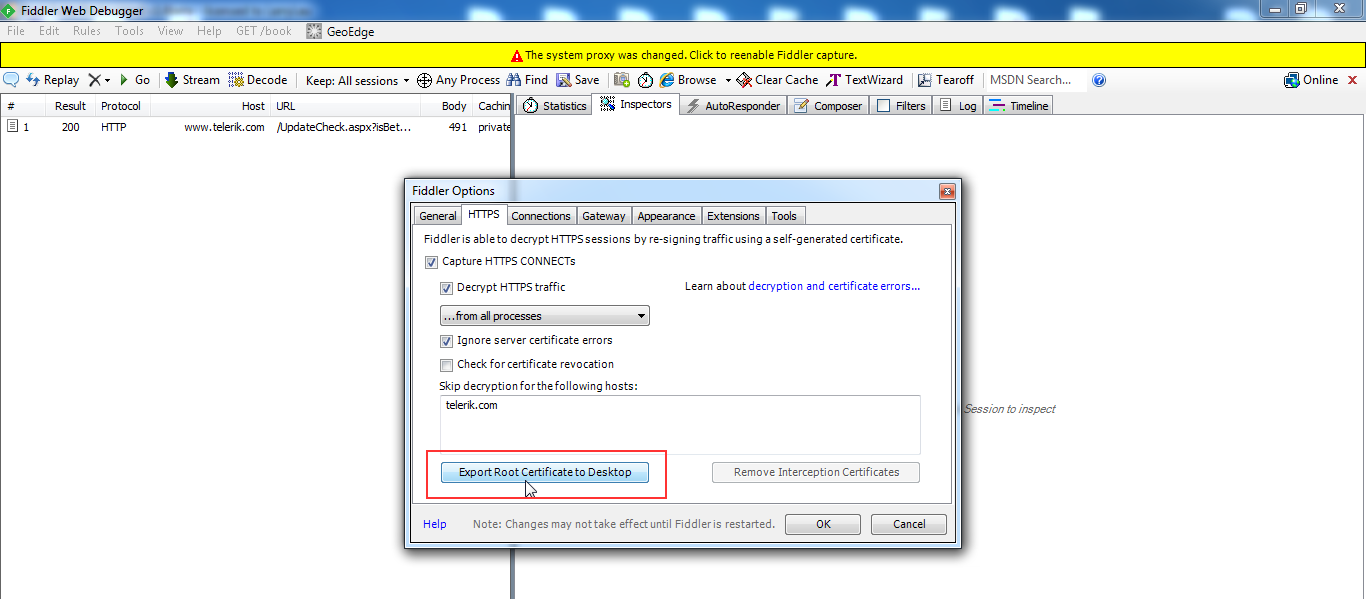
Figure 13
Open the email containing the certificate and click on it. The device will ask you to install the profile/certificate or not. Click on ‘install’.
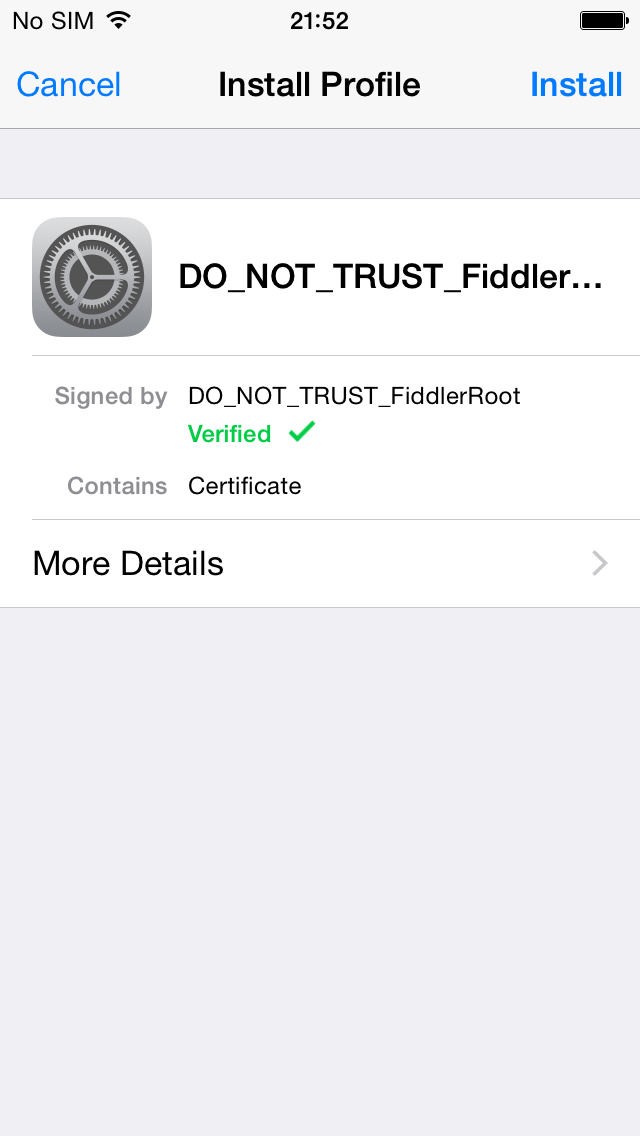
Figure 14
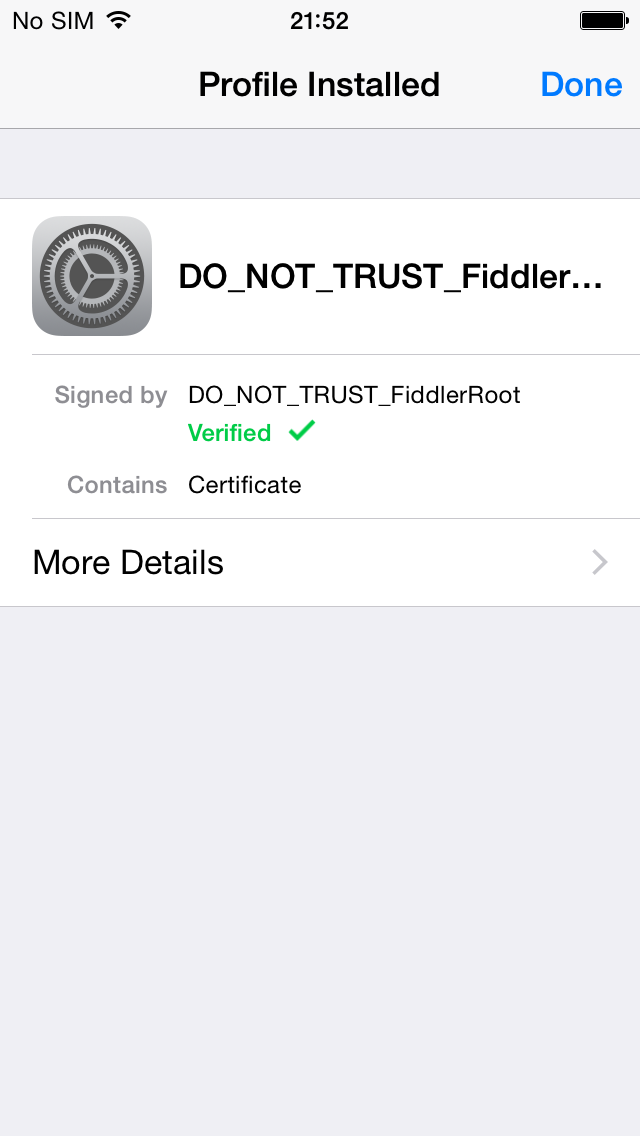
Observe in the below snapshot that the certificate is successfully installed now.
Now the last step is to configure the proxy. Go to – Settings – Wi-Fi Select your network – Manual proxy.
Here enter your workstation IP address and make it listen on port 8888. Port 8888 is fiddlers default port. In this way the https traffic of the application will navigate to fiddler and finally fiddler will transfer the same to burp.
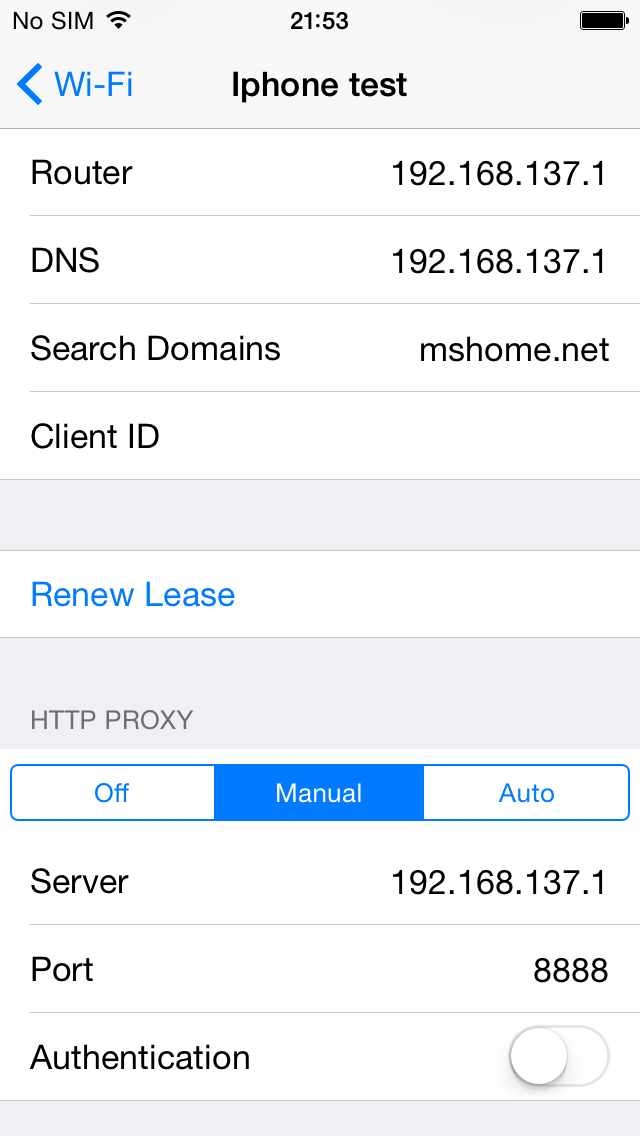
Figure 16
Now traverse your application, observe in the below screenshot that https proxy is captured into fiddler (figure 17) and then navigates to burp (figure 18)
Enjoy Intercepting 🙂
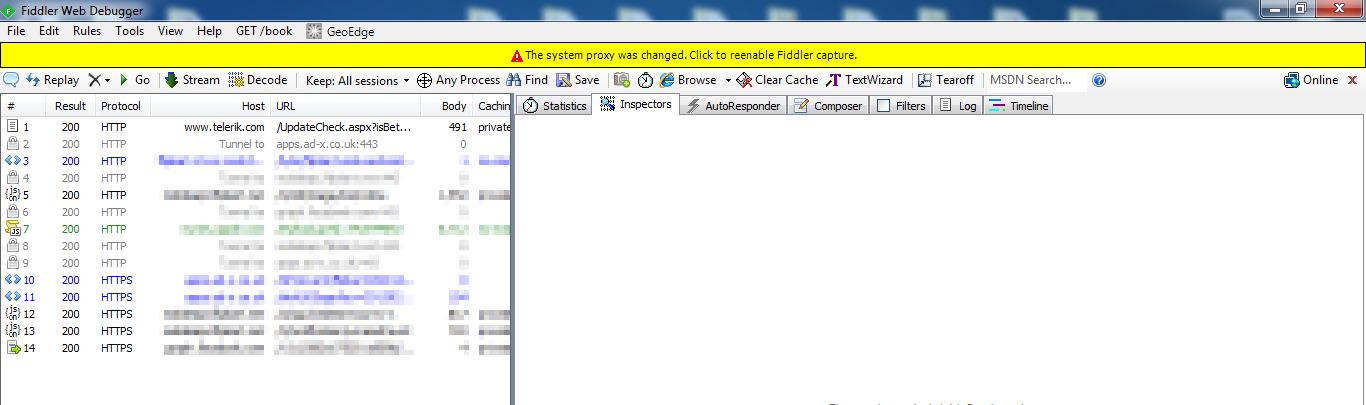
Figure 17
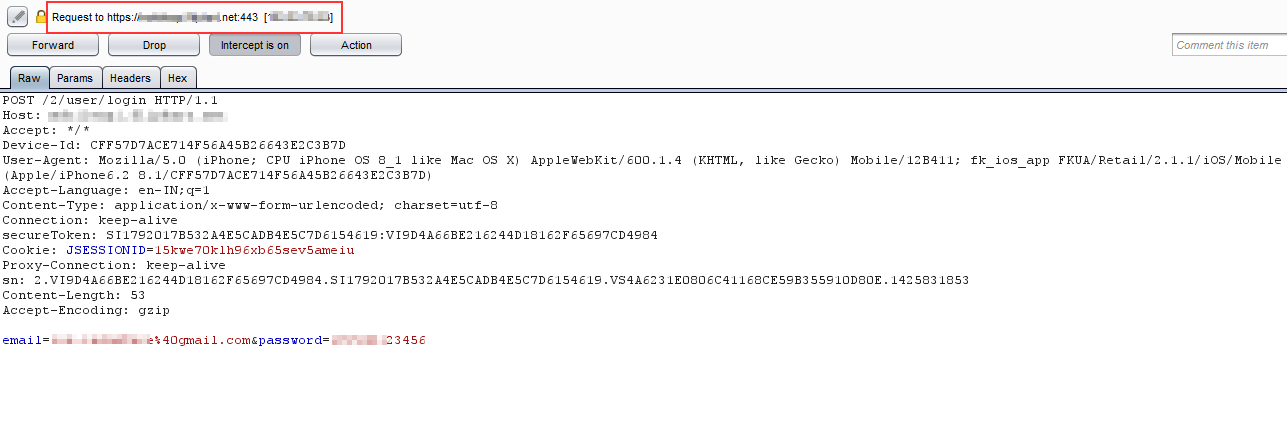
Figure 18
We can perform various attacks through application traffic analysis like Client Side Injection, Transport Layer Security, Data Manipulation, Analysis of Error Messages, Business Logic Checks, Session Management, Banner Grabbing and Information Gathering etc.
References:
- https://www.owasp.org/index.php/IOS_Application_Security_Testing_Cheat_Sheet
- https://www.owasp.org/index.php/Projects/OWASP_Mobile_Security_Project_-_Top_Ten_Mobile_Risks
- iTools – http://itools.en.uptodown.com/
- iFunbox – http://dl.i-funbox.com/
- Fiddler – http://www.telerik.com/download/fiddler1
- Burp – http://portswigger.net/burp/download.html
In the next article we will see how to perform reverse engineering and memory analysis.
-TO BE CONTINUED-
About The Author

Sonal Gawand, Assistant Manager – Enterprise Risk Services